There are many ways to upload file to your AWS EC2 instance, I choose always one of these two, because they make use of the key pair file, and both are easy and secure.
Commandline
Assuming you have a Key Pair file .pem already created in EC2 management console, use this command to upload file to your remote machine (EC2 instance). I am running Ubuntu Server 12.04.2 LTS 64 and scp was already pre installed.
$ scp -i ec2.pem file_to_upload.txt ubuntu@ec2-23-22-122-111.compute-1.amazonaws.com:/home/ubuntu/-i option for using the key is followed by path to key file-name, where ec2.pem should be name of your key file, this command works only if you are in the directory where .pem file is stored, otherwise use full path like /home/Downloads/your_key_name.pem … Continue with path to the file you wish to upload, follow with username@public_dns_hostname and then input “:” and follow with destination path on remote server (EC2 instance), beware not to use blank space after colon, otherwise you will get error.
GUI with FileZilla
In FileZIlla, open from menu Edit > Settings > Connection > SFTP > Add keyfile…
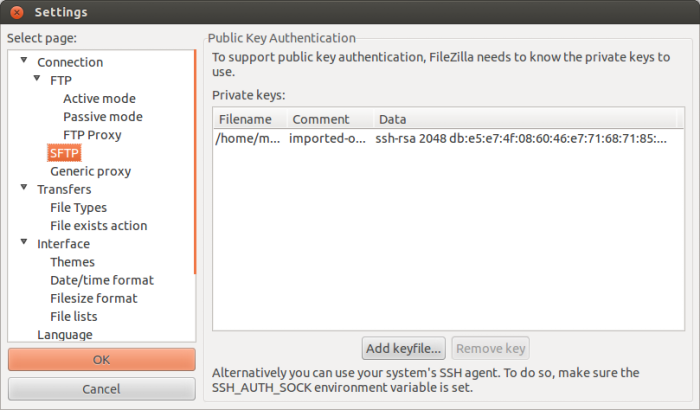
You will be asked to convert key to other format, agree with OK.
Exit settings.
Go to Site manager. As Host enter your Public DNS from EC2 management console > Instances > Description. Choose SFTP – SSH File Transfer Protocol, input user ubuntu, which is default on Ubuntu AMIs (or whatever is your username after you logon to EC2 instance) and click connect.
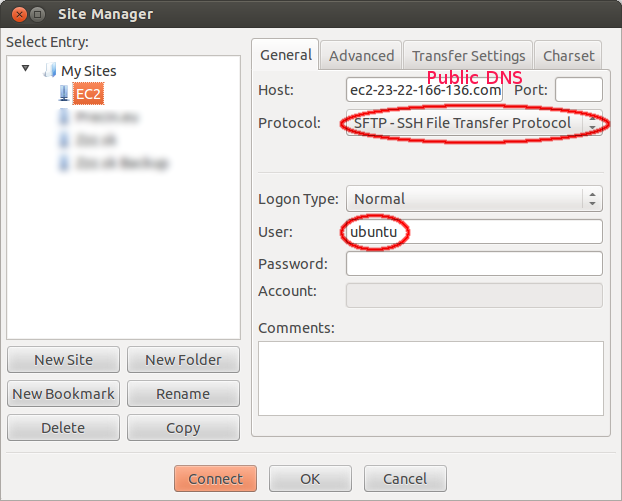
You may be prompted to accept public key, that is all.
File permissions for .ppk file and it’s folder
Folder in which .ppk file that I converted from .pem resides is chown 750 and file is chown 600, this way it works without complaining about Error: Pageant failed to answer challenge or Could not connect to server, these error messages disappear whet permissions are set correctly, also some error messages could appear when connecting using ssh -i, if your .pem file is not chmod 600.